January 3, 2020
Ship in Bottle 3 (part 7)
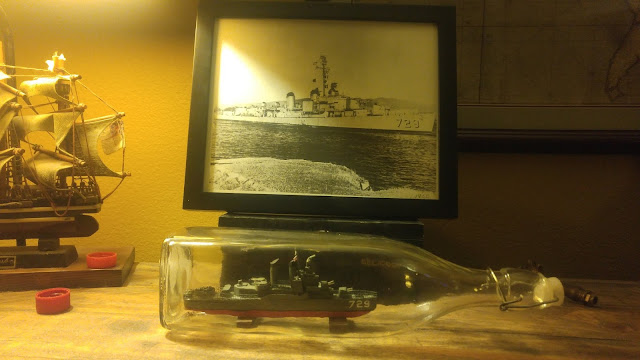
So it's been a couple of years, but I finally had a stroke of inspiration from my wife and I got it done!
I've done a lot since my last post. What follows will catch you up since then.
Mess around until you get the top where you wanted it to go. I actually did a dry run before applying glue so I knew which tools would help me get the pieces where I wanted them. You have to work sort of fast here so your glue on the deck doesn't dry. This is why I like standard wood glue, gives you a good twenty minutes--though in my experience you only need about 3-5 minutes.
With these forceps I can exert downward pressure on the ship to act like a clamp. It helps eliminate gaps in your construction and I let it sit like that overnight. Then I started taking pics and bragging to everyone I know!
Posts for this build:
Part 1
Part 2
Part 3
Part 4
Part 5
Part 6
Part 7
I've done a lot since my last post. What follows will catch you up since then.
I added some guns in front of the first smoke stack and some side walls at midship. These walls are just made out of cardstock that I folded and painted gray.
Made a mast and signal flags. The mast is made out of a toothpick that I sanded to get a tapered look towards the top. I drilled a hole right through it to get the crossbeam through it and glued it. The mast attaches to a sewing needle sticking up from the deck, and I drilled a hole into the bottom of the mast to accept the needle.
The black thread is exactly what it sounds like: black thread from my wife's sewing stash. I tied and secured with a spot of glue.
The signal flags--one of my favorite parts of the whole build--are the signals for D, J, and T: Donald Joseph Tyson, my grandfather and the whole reason I'm building the USS Lyman K Swenson.
I kept trying to make these props but it just wasn't working out so I found a guy that 3D prints them. I attached them to sewing needles. I painted them gold later.
Also, you'll see I introduced a rail going around the deck. This is nothing more than window screen that I painted. In other places you'll see I used the same screen to make ladders. Super easy.
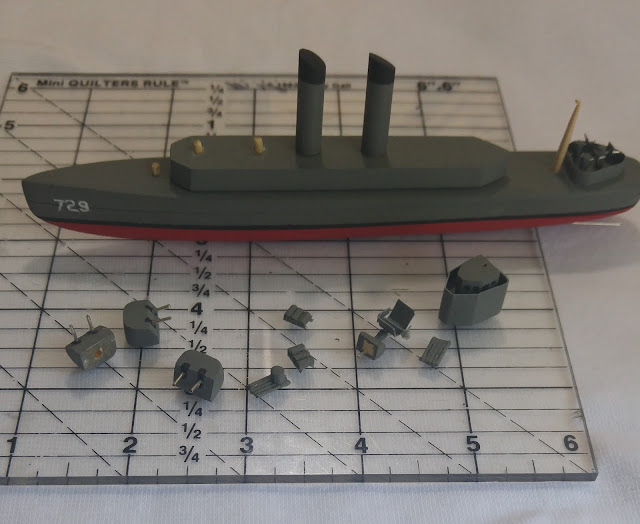
Time to contemplate the bottle. Above you'll see all the separate pieces that have to go in and be assembled once they're in there.
Get the base in first. I start by sticking tape to the bottom of the bottle to act as sights. This is where I want my brown stands to be. I just glue them with wood glue and am impressed with how well it holds to the glass.
Above you'll see I added some more pieces. Obviously you have to wait for the glue on the last piece to dry before you can add the next one. I usually put on one piece each evening. This is where things get really difficult because the neck of my bottle is so long.
Just keep plugging away. With the right music and enough deep breaths you can keep your concentration. Just take it one piece at a time. There's really no secret here other than this: if you're not able to get a piece into the right spot, you're using the wrong tool.
Once the mast is in place I'll be ready for the final task: join the superstructure to the deck.
I use a long stick that I apply a glob of glue onto.
Let the glob of glue fall onto the deck, slowly retracting the stick as you go so that you get a nice line of glue.
Mess around until you get the top where you wanted it to go. I actually did a dry run before applying glue so I knew which tools would help me get the pieces where I wanted them. You have to work sort of fast here so your glue on the deck doesn't dry. This is why I like standard wood glue, gives you a good twenty minutes--though in my experience you only need about 3-5 minutes.
With these forceps I can exert downward pressure on the ship to act like a clamp. It helps eliminate gaps in your construction and I let it sit like that overnight. Then I started taking pics and bragging to everyone I know!
Posts for this build:
Part 1
Part 2
Part 3
Part 4
Part 5
Part 6
Part 7
September 15, 2016
Ship in Bottle 3 (part 6)
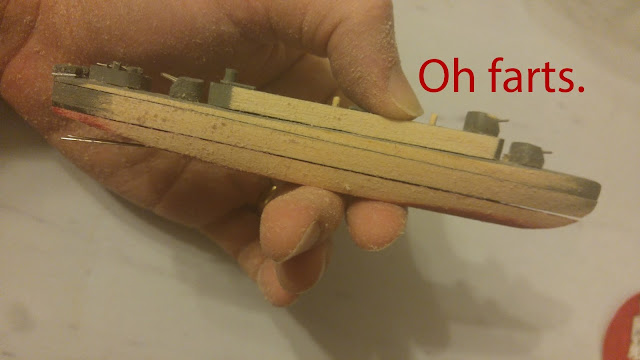
Guess what? The friggin thing won't fit in the bottle! I don't know how I forgot to check this weeks ago, but I guess I did. The hull was just too wide, no chance this ship was going to fit through the neck of the bottle.
What's more, this isn't the first time I've made this mistake. Note the top picture of the finished product compared to the next picture which is me planning the ship using a different bottle. Yup, got everything built, tried to put the ship in the bottle, and discovered it didn't fit. Had to get a new bottle because I wasn't willing to rework anything. Today, I'm going to go the rework route instead.
I can't believe I have to say this, but seriously, when you're done shaping the hull, you're going to want to make sure the ship fits in the bottle. Otherwise, you either get a new bottle or fix the ship. This was fairly heartbreaking but it had to be done:
I'm hesitant to say this because I might be doomed to repeat the mistake, but "Oh well, lesson learned". I'll obviously have to repaint it after this sanding, but the only other thing I lost was the hull number which is fine--I was only 80% happy with the "729" anyway.
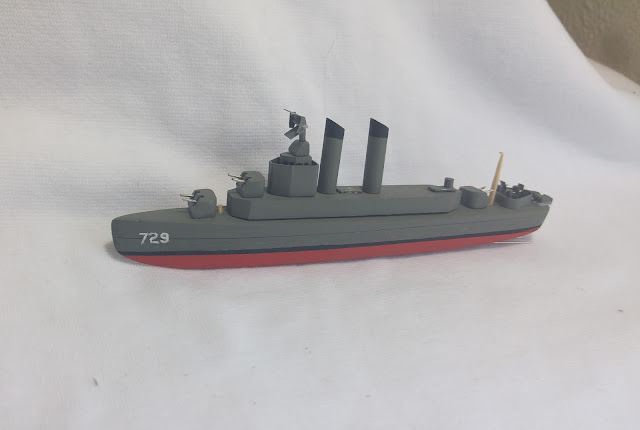
I've repainted since this picture and added a few for structures to the deck. Oh, almost forgot, I made sure it fits in the bottle now. That's important.
The USS Lyman K Swenson is getting there slowly but surely. I'd still rather be struggling with a model than sitting in the Pacific shooting down kamikaze pilots. I have it easy.
Posts for this build:
Part 1
Part 2
Part 3
Part 4
Part 5
Part 6
Part 7
What's more, this isn't the first time I've made this mistake. Note the top picture of the finished product compared to the next picture which is me planning the ship using a different bottle. Yup, got everything built, tried to put the ship in the bottle, and discovered it didn't fit. Had to get a new bottle because I wasn't willing to rework anything. Today, I'm going to go the rework route instead.
I can't believe I have to say this, but seriously, when you're done shaping the hull, you're going to want to make sure the ship fits in the bottle. Otherwise, you either get a new bottle or fix the ship. This was fairly heartbreaking but it had to be done:
Sorry Lyman.
I'm hesitant to say this because I might be doomed to repeat the mistake, but "Oh well, lesson learned". I'll obviously have to repaint it after this sanding, but the only other thing I lost was the hull number which is fine--I was only 80% happy with the "729" anyway.
I've repainted since this picture and added a few for structures to the deck. Oh, almost forgot, I made sure it fits in the bottle now. That's important.
The USS Lyman K Swenson is getting there slowly but surely. I'd still rather be struggling with a model than sitting in the Pacific shooting down kamikaze pilots. I have it easy.
Posts for this build:
Part 1
Part 2
Part 3
Part 4
Part 5
Part 6
Part 7
September 2, 2016
Ship in Bottle 3 (part 5)
Well hey we're coming along nicely.
Looking pretty cool
I've done a lot in the last few weeks, since we last spoke:
- Rounded out the 3x2 5" gun mounts (the big 3)
- Added a second tier for the superstructure
- Created the bridge
- Topped the bridge with a radio antenna
- Added smokestacks
- Added 10 torpedo tubes (5 between smokestacks and 5 at the back of the raised deck)
- Stumbled my way through three of the eleven 20 mm AA guns (rear of ship)
- Made two depth charge tracks at the back of the ship
Jesus, I should have blogged some of this along the way. Let's take a closer look at all the parts
Bunch of pieces
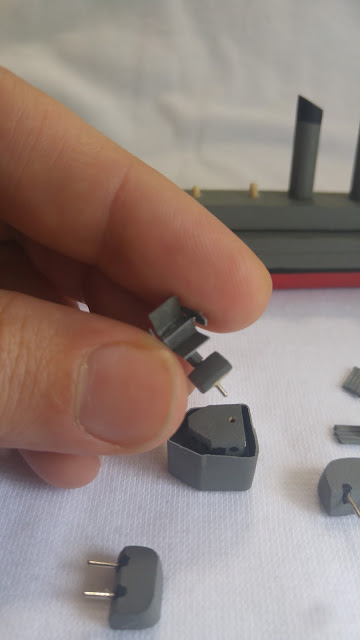
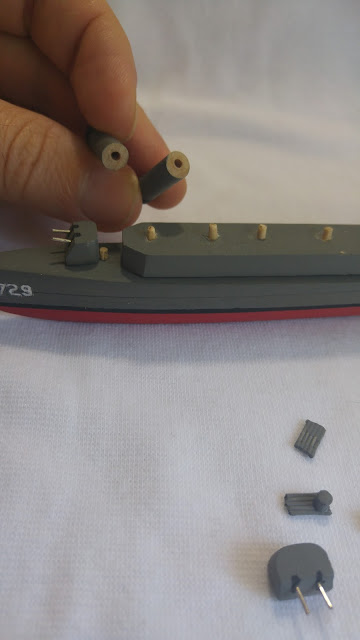
In the foreground to the left you see the big guns which we already covered. Next you see the rear torpedo tube which is just made out of five lengths of wire, similar to paper clips, just snipped, glued side by side, and painted. I had a tiny dowel that I cut to make what I can only assume is some control apparatus that sits on top.
To the right of the first torpedo tube array are the depth charge tracks that sit on the back of the ship. The depth charges look like barrels that just roll off the back of the ship, sink, and blow up, potentially ruining a submarine's day. These are two separate tracks each with three depth charges made out of toothpicks. The real USS Lyman K Swenson had tracks that held 12 or 15 (can't remember which) depth charges but I can't fit anything longer than 3 because I'm an idiot.
Next to that is the radar that sits on top of the bridge. Looks like a desk chair. Then we have another torpedo tube array and the bridge.
The bridge was made using some wood wrapped in cardstock that is taller than the wood so as to create a fence or rail. Then I cut a smaller piece of wood and fit it inside.
The smokestacks were made from dowels cut at an angle and painted. The AA guns at the back were a pain in the ass and I'm not too sure how I feel about them, but I'm going to have to make 8 more of them. By the time I have 11 of them on this ship I'll definitely have a strong opinion. I'm just not yet sure if my design works or if it makes it look like a 10 year old made them.
I do want to show you a close up of the radio antenna I made. Fun fact: the easiest way to see if you're looking at a picture of a US Navy ship from WWII/Korea era or Vietnam era is that in the later war you'll see a satellite dish instead of a radar antenna. Neat.
This took an embarrassing amount of time to make
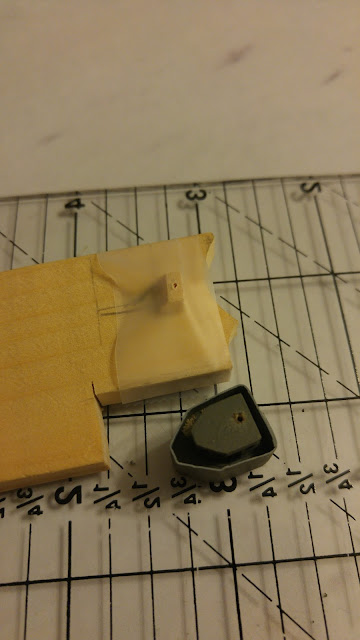
I'll agree it looks kind of silly up close but once the whole ship is assembled I think it reads pretty well. It better, because it took me like 3 hours to make it. It's made from four pieces of folded and painted cardstock, two pieces of wire arranged like a cross, and a little piece of wood for a base. You can see in the background that this will get mounted into that hole on top of the bridge, but I'll have to do that once the ship's in the bottle.
Speaking of having to build stuff once the ship is inside the bottle, I tested the heights to see what I could actually start securing to the deck outside the bottle.
Always a good idea to test the fit
Well jeez, I'm going to have to assemble a lot of this ship inside the bottle. Looks like I can glue the big guns down, which you can see in the image above through the neck of the bottle, but anything the height of the bridge or taller is going to have to wait until I'm inside the bottle. Farts. Solution time.
For easy assembly of the ship inside the bottle
I decided I could get the most precise layout by drilling holes for toothpicks in the deck and in each of the pieces. This way I can slide the hull into the bottle, then slide the deck into the bottle, and finally, use some glue and some long pokies that I have, drop them into their final homes. This would be far easier than gluing stuff inside the bottle without a well defined layout. At least I can glue down the big guns, AA guns, torpedo tubes, and depth charge tracks.
I'll leave you with one last thing since the point of this website is to share what I learn as I build ships in bottles from scratch. The base of the antenna is a tiny piece of wood with a hole drilled through it. It can be hard to drill tiny holes, so I do a lot of this:
Protip
Secured it with plain old scotch tape. Until next time...
June 27, 2016
The Niña and Pinta
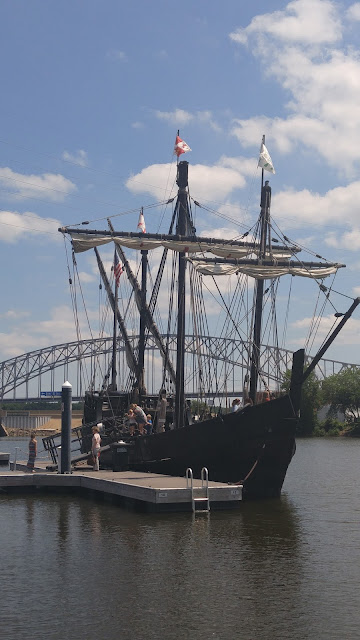
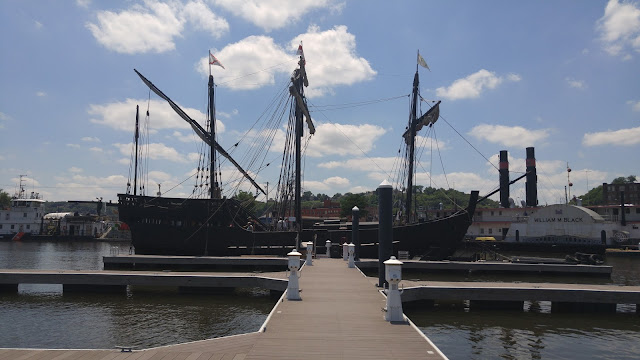
I don't know what it is, but I love the look of old sailing ships--that's why I like building ships in bottles so much, and it's probably why you're here reading about building ships in bottles. Unfortunately, I live in Iowa so I've never actually seen an old style sailing ship...until now! For Father's Day my wife and daughter were looking for something fun for us to do and they found that the Niña and Pinta were sailing up the Mississippi river and would be an hour away from our house.
These two ships were commissioned in the late 1980's by the Columbus Foundation and are easily the most realistic replicas of Columbus's ships ever built. For $8 you can walk on board and talk with the staff who will be happy to answer all of your questions. You can read more about the Columbus Foundation and their ships. You can even volunteer to work aboard these ships for a minimum 3-4 week commitment. Man that would be something.
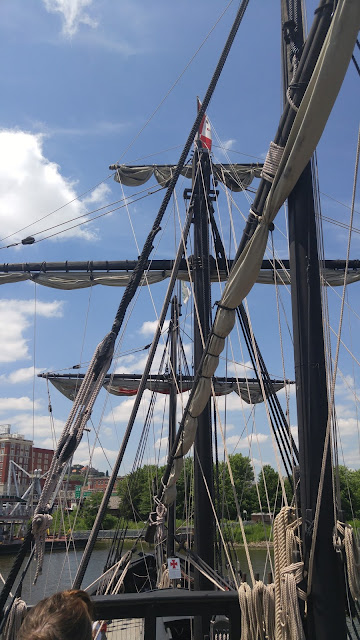
Keep an eye out, since they travel the eastern US river system, it's a great way for landlocked people to finally set their eyes on a legit-ass sailing ship! My advice: take tons of pictures. Being able to walk around the ships I was able to see angles I've never seen before and I was able to take note of details that will help me in future builds. For example, I didn't realize the deck is inclined so highly at the bow and I'm not sure I ever would have realized that without standing on it myself. My ships in bottles will definitely be impacted by this experience, especially in the realms of details and realism (which is probably 90% of modeling anyway).
I'm not carrying a purse. Two year old children require a bag. This is the Niña. Thumbs up dude.
The Niña again
The Pinta, larger of the two. This one was built slightly larger than reality.
Look at all that rigging. Pinta from the upper deck.
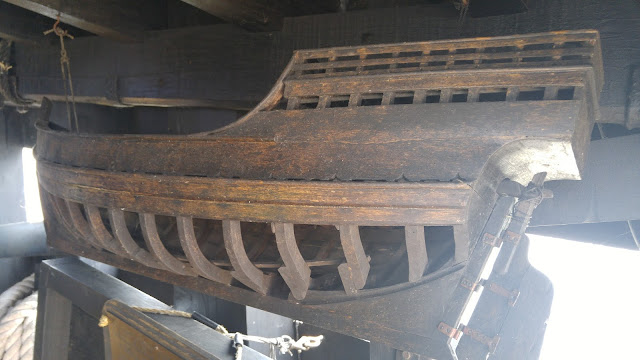
We should probably talk about models since that's kind of the point of this website. Fun fact: in the 1490's it was hard to find a shipwright who was literate so the "blueprints" they used were actually models.
Model serving as a blueprint for Niña. Built by a 15 year old Brazilian kid.
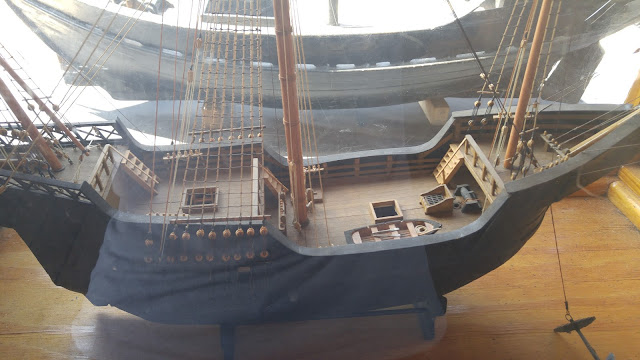
What about the Santa Maria? They had a detailed model of it on the Pinta.
I realize this post isn't strictly about building model ships in bottles, but it was such a unique experience for an Iowan that I figured I should share it. I've heard enough from some followers on my Instagram to know that I'm not the only landlocked sucker who would love to see a ship like this but assumes they'll never get the chance. Be sure to check out the Columbus Foundation's website about these ships and see where they'll be going next, maybe you'll get lucky!
May 22, 2016
Ship in Bottle 3 (part 4)
Let's make some guns! The armament is extensive on this destroyer but for now I'm just focusing on the largest guns. I did some research to find out that the USS Lyman K Swenson (all Sumner class destroyers...and apparently most of the US Navy at that time) had 5/38 caliber guns in Mk 38 DP mounts in a 3x2 configuration. Wtf does that mean?
5/38: This gun shoots a 5 inch diameter shell (holy crap) and the barrel is 38 shell-diameters long (5x38=190 inches, or 15.8 feet).
Mk 38: Mark 38 - I think this means the 38th revision of the gun. I wouldn't be surprised if someone can correct me here though.
DP: Dual Purpose - it can be loaded with one type of shell and powder charge for surface engagements (shooting at other boats and I think this also includes bombarding targets on land) and can be loaded with a different type of shell for air targets. I didn't realize dual purpose guns existed. Pretty badass.
3x2 configuration: There are three gun mounts, each with two barrels.
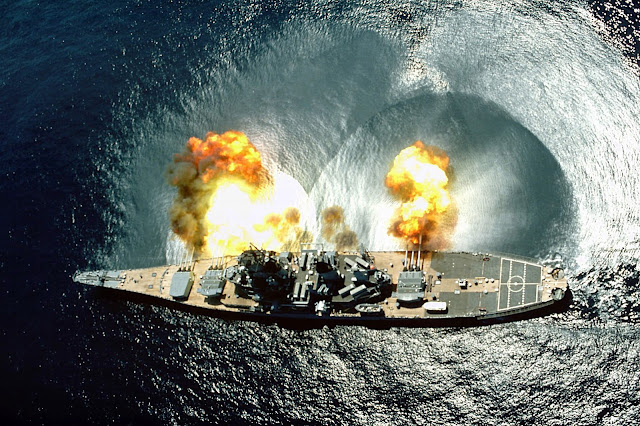
Bucket list addition: I want to hear these go off in person, but I'd settle for the 16 inch monstrosities that the Iowa class uses. By the way, look what that looks like firing a broadside:
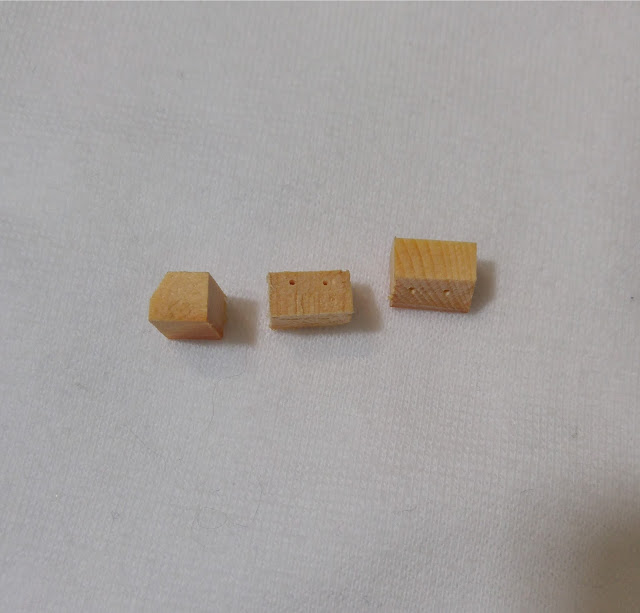
I need to quit researching these guns before I run out and join the navy. Anyway, as I said before, let's make some guns. I put my scroll saw to the test and cut out the basic shapes. I also used my smallest drillbit which is 1/32" to make the holes where the barrels would go. At this point I'm still not sure what I'll make the barrels out of.
Posts for this build:
Part 1
Part 2
Part 3
Part 4
Part 5
Part 6
Part 7
5/38: This gun shoots a 5 inch diameter shell (holy crap) and the barrel is 38 shell-diameters long (5x38=190 inches, or 15.8 feet).
Mk 38: Mark 38 - I think this means the 38th revision of the gun. I wouldn't be surprised if someone can correct me here though.
DP: Dual Purpose - it can be loaded with one type of shell and powder charge for surface engagements (shooting at other boats and I think this also includes bombarding targets on land) and can be loaded with a different type of shell for air targets. I didn't realize dual purpose guns existed. Pretty badass.
3x2 configuration: There are three gun mounts, each with two barrels.
Bucket list addition: I want to hear these go off in person, but I'd settle for the 16 inch monstrosities that the Iowa class uses. By the way, look what that looks like firing a broadside:
USS Iowa firing a broadside of nine 16 inch and six 5 inch guns. This is like 20,000 pounds of lead.
I need to quit researching these guns before I run out and join the navy. Anyway, as I said before, let's make some guns. I put my scroll saw to the test and cut out the basic shapes. I also used my smallest drillbit which is 1/32" to make the holes where the barrels would go. At this point I'm still not sure what I'll make the barrels out of.
Since there are three, I can show you three sides at once (side view, front view, top view).
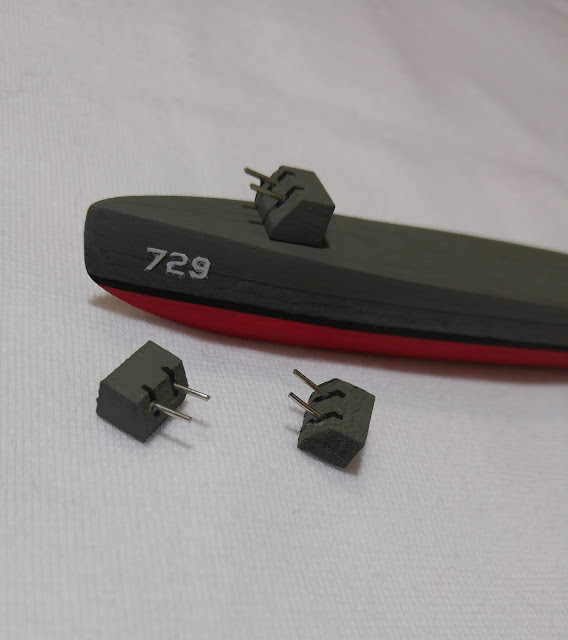
They're small, but I was able to paint them by hand. I used the same gray that I used for the hull and then painted the black lines delicately. The black lines are slots the barrels elevate within and since these are dual purpose they need to be able to elevate to a high angle. That means I need to make sure the lines continue on the roof of the mount. I lucked out and found that the steel wire I have (I decided to use steel wire to make an anchor here) is exactly 1/32" so it worked perfectly as barrels. A little glue on the ends and I was able to shove them in the mounts. I totally eyeballed the length. Even though I know these barrels are 15.8 feet, I don't know how much length protrudes outside the mount. They look about right to me.
That looks pretty decent I think. I might paint the barrels to remove the shine.
So there we go, 3x2 Mk 38 DP 5"/38 caliber death machines. I'm dragging my feet because the next thing to do is the superstructure but I'm nervous because it's a busy jungle gym of platforms and towers. I'm sure I'll figure something out.
Posts for this build:
Part 1
Part 2
Part 3
Part 4
Part 5
Part 6
Part 7
May 15, 2016
Ship in Bottle 3 (part 3)
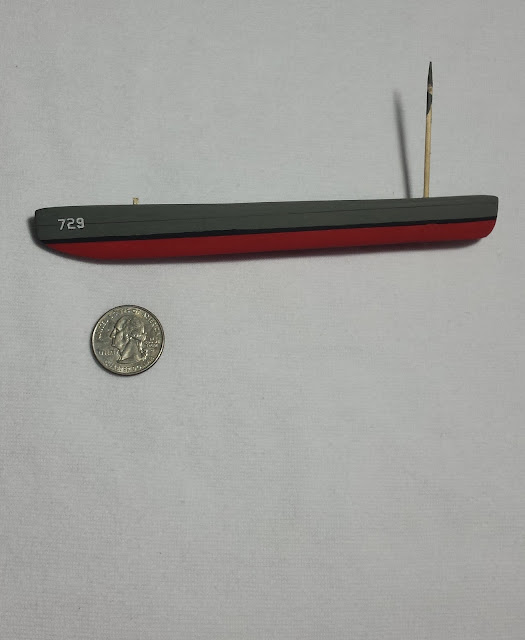
This will be a short post as I haven't made too much progress since the last post but I did get the hull numbers on there and I'm pretty happy about how they look so I figured I'd share. USS Lyman K Swenson had hull number 729, so here's what it looks like once I added it.
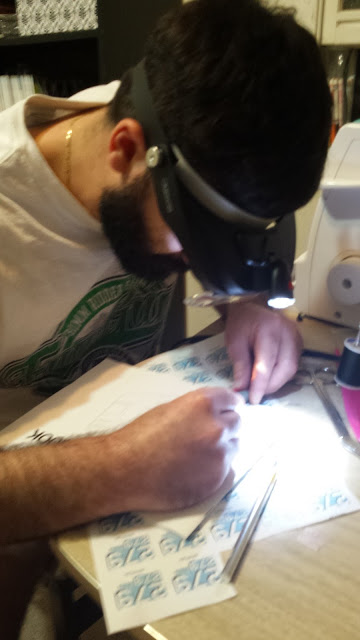
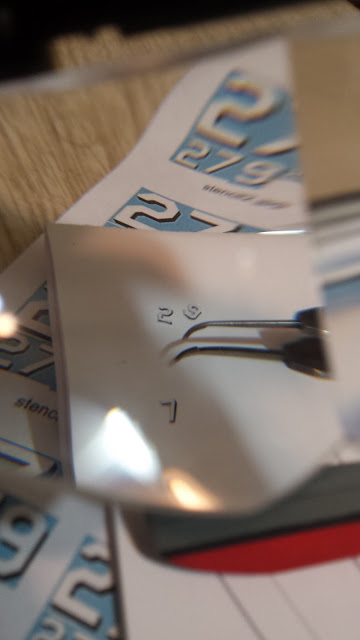
Threw on the magnifiers and started cutting with the x-acto knife. Took a few tries, some bad words, and some hours, but I got there. The inside of the 9 was especially difficult. (Protip from a woodworker on Instagram after I mentioned my difficult time: use a tiny drill bit to drill out the center of the 9)
Posts for this build:
Part 1
Part 2
Part 3
Part 4
Part 5
Part 6
Part 7
Looks pretty cool I think
I had a bunch of ideas for how I was going to do it but eventually settled on printing them, cutting them out, and gluing them on. I'm glad I went with this route because my original thought of painting them by hand was not going to pan out. Too small.
I started by googling "battleship hull font" and found an image of 0-9 written out in the right font, so I just saved the image and printed it out a few times until I had something that seemed like the right size.
I started by googling "battleship hull font" and found an image of 0-9 written out in the right font, so I just saved the image and printed it out a few times until I had something that seemed like the right size.
You can see the 50 of these that I printed in various sizes
Neat shot through the lenses
Once I had them cut out, I used tweezers and a glue stick to get them on the hull. Then I felt good about myself. I think it looks pretty awesome, but I've still got a long way to go. Creating the guns and towers is probably where I'll go next and that will really start bringing this to life.
Posts for this build:
Part 1
Part 2
Part 3
Part 4
Part 5
Part 6
Part 7
May 9, 2016
Ship in Bottle 3 (part 2)
Alright, we've done our research and we've completed planning the scale for a historically accurate ship, so we're ready to get some real work done.
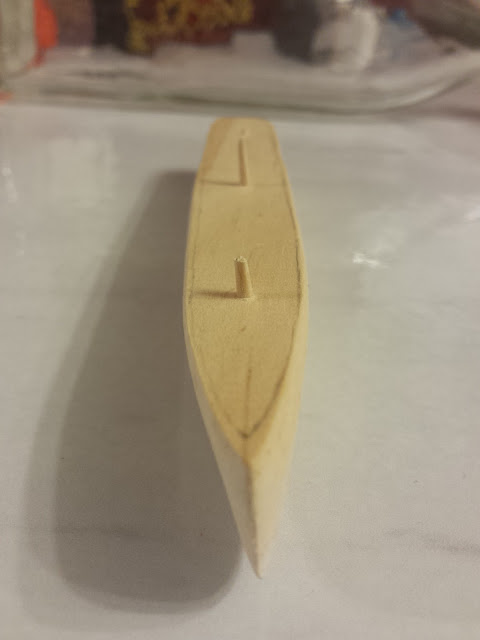
As in my previous two builds, I started by stacking wood planks (visit the tools and supplies page to see the wood I'm using), drilling three holes in them, and shoving toothpicks in the holes to keep it all pinned together. This time I'm using three planks because it matched the dimensions from my scaling maths.
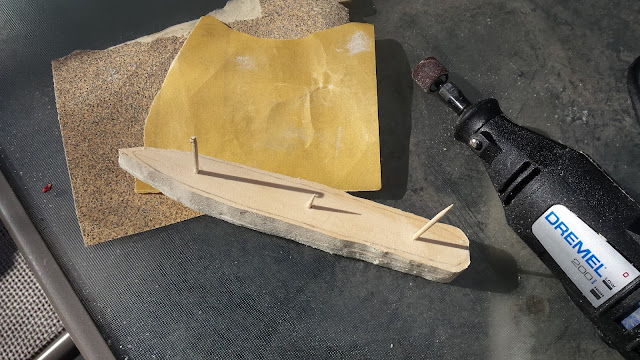
Next I cut out the scale drawing I made in the last post, put it on top of the wood, and traced it so I have a guide. I used a Dremel to sand away most of the wood and when I got to the point in the picture below I switched to sanding by hand.
I finally have a scroll saw. Hopefully I won't have to sand like an idiot anymore.
Seriously though. Get a scroll saw.
So after a number of hours that I'm not prepared to admit publicly, I finally got most of the sanding done. It took a couple of sessions. I basically would sit down with a picture of the ship and just keep referring to it while sanding. If anyone else has a better method, I'm all ears. (Yeah I know, use a scroll saw.)
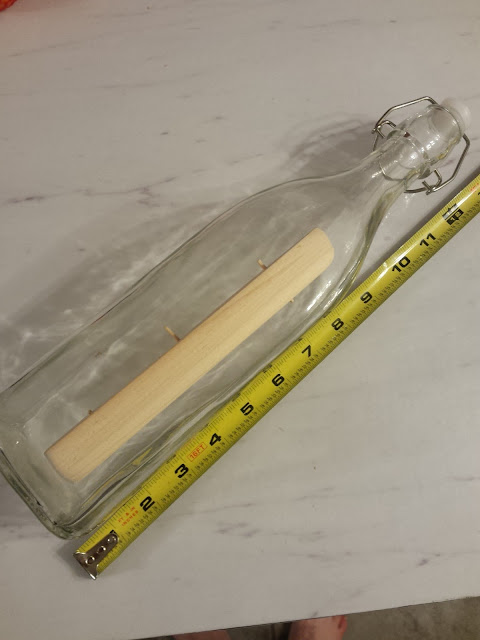
If you recall from my first build, I forgot to check that the ship would fit in the bottle, so I went ahead and did that at this step. Not only do you want to verify the individual pieces can fit through the neck but you also want to make sure the proportions look good in the chosen bottle. If they don't, get a different bottle.
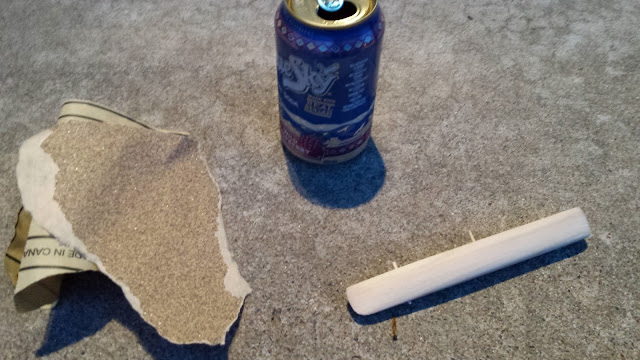
Without a scroll saw there's not much you can do other than sit on your stoop at midnight with some tunes and get sanding.
So after a number of hours that I'm not prepared to admit publicly, I finally got most of the sanding done. It took a couple of sessions. I basically would sit down with a picture of the ship and just keep referring to it while sanding. If anyone else has a better method, I'm all ears. (Yeah I know, use a scroll saw.)
If you recall from my first build, I forgot to check that the ship would fit in the bottle, so I went ahead and did that at this step. Not only do you want to verify the individual pieces can fit through the neck but you also want to make sure the proportions look good in the chosen bottle. If they don't, get a different bottle.
Damn that's going to look pretty good.
I made a few minor adjustments to try and achieve the mean, sharp look of the real hull.
Just a little more sanding and we'll be ready to paint.
At this point I'm just dying to paint the thing because I have an embarrassing number of hours into the project with little bang for my buck. Painting makes you feel like you've achieved something because it's such a drastic change compared to naked wood. In actuality I have plenty of bang for my buck, it just feels slow going.
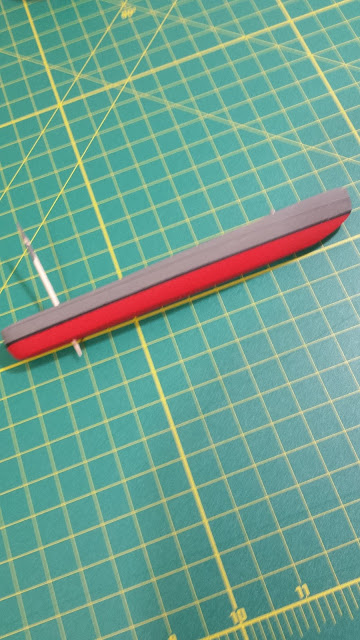
I noticed that obviously the ship is gray above the water line, black at the water line, and it's red below the water line. Fun fact, the red paint is used to slow the growth of bacteria and barnacles. It's red because it has a lot of copper in it.
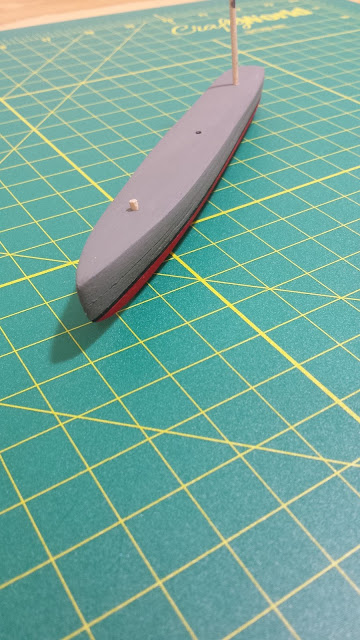
I separated the three pieces off the toothpicks and started painting. Pretty self explanatory except if you're wondering how I did the black stripe. Still pretty simple but I just masked it off with tape and painted with a small paintbrush. Felt like surgery, was cool, would recommend.
The next step is where things are going to start getting complex because we have to build the superstructure (all the shit that sits above the deck). I'm looking forward to making the guns but the bridge and towers and smoke stacks seem a little daunting to be honest. I'm sure we'll get there though. Thanks to my buddy Alec for the scroll saw, it's going to be a huge help for the next phase!
Actually I'm pretty excited to get the "729" on the hull so I'll probably do that next. No idea how, but I'll be sure to report on that.
Posts for this build:
Part 1
Part 2
Part 3
Part 4
Part 5
Part 6
Part 7
I noticed that obviously the ship is gray above the water line, black at the water line, and it's red below the water line. Fun fact, the red paint is used to slow the growth of bacteria and barnacles. It's red because it has a lot of copper in it.
I separated the three pieces off the toothpicks and started painting. Pretty self explanatory except if you're wondering how I did the black stripe. Still pretty simple but I just masked it off with tape and painted with a small paintbrush. Felt like surgery, was cool, would recommend.
Starting to feel like a WWII destroyer.
I like the red. Mixed a little brown with it to tone it down.
The next step is where things are going to start getting complex because we have to build the superstructure (all the shit that sits above the deck). I'm looking forward to making the guns but the bridge and towers and smoke stacks seem a little daunting to be honest. I'm sure we'll get there though. Thanks to my buddy Alec for the scroll saw, it's going to be a huge help for the next phase!
Actually I'm pretty excited to get the "729" on the hull so I'll probably do that next. No idea how, but I'll be sure to report on that.
Posts for this build:
Part 1
Part 2
Part 3
Part 4
Part 5
Part 6
Part 7
Subscribe to:
Posts
(
Atom
)
