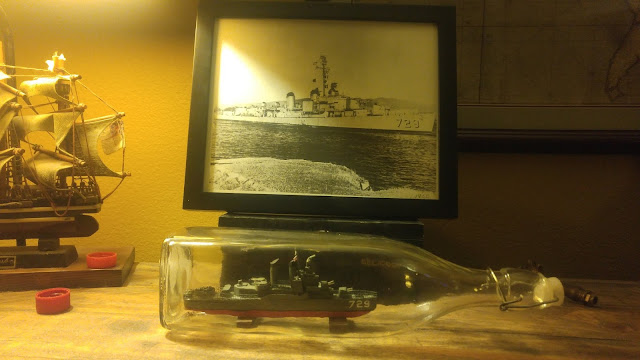
I've done a lot since my last post. What follows will catch you up since then.
I added some guns in front of the first smoke stack and some side walls at midship. These walls are just made out of cardstock that I folded and painted gray.
Made a mast and signal flags. The mast is made out of a toothpick that I sanded to get a tapered look towards the top. I drilled a hole right through it to get the crossbeam through it and glued it. The mast attaches to a sewing needle sticking up from the deck, and I drilled a hole into the bottom of the mast to accept the needle.
The black thread is exactly what it sounds like: black thread from my wife's sewing stash. I tied and secured with a spot of glue.
The signal flags--one of my favorite parts of the whole build--are the signals for D, J, and T: Donald Joseph Tyson, my grandfather and the whole reason I'm building the USS Lyman K Swenson.
I kept trying to make these props but it just wasn't working out so I found a guy that 3D prints them. I attached them to sewing needles. I painted them gold later.
Also, you'll see I introduced a rail going around the deck. This is nothing more than window screen that I painted. In other places you'll see I used the same screen to make ladders. Super easy.
Time to contemplate the bottle. Above you'll see all the separate pieces that have to go in and be assembled once they're in there.
Get the base in first. I start by sticking tape to the bottom of the bottle to act as sights. This is where I want my brown stands to be. I just glue them with wood glue and am impressed with how well it holds to the glass.
Above you'll see I added some more pieces. Obviously you have to wait for the glue on the last piece to dry before you can add the next one. I usually put on one piece each evening. This is where things get really difficult because the neck of my bottle is so long.
Just keep plugging away. With the right music and enough deep breaths you can keep your concentration. Just take it one piece at a time. There's really no secret here other than this: if you're not able to get a piece into the right spot, you're using the wrong tool.
Once the mast is in place I'll be ready for the final task: join the superstructure to the deck.
I use a long stick that I apply a glob of glue onto.
Let the glob of glue fall onto the deck, slowly retracting the stick as you go so that you get a nice line of glue.
Mess around until you get the top where you wanted it to go. I actually did a dry run before applying glue so I knew which tools would help me get the pieces where I wanted them. You have to work sort of fast here so your glue on the deck doesn't dry. This is why I like standard wood glue, gives you a good twenty minutes--though in my experience you only need about 3-5 minutes.
With these forceps I can exert downward pressure on the ship to act like a clamp. It helps eliminate gaps in your construction and I let it sit like that overnight. Then I started taking pics and bragging to everyone I know!
Posts for this build:
Part 1
Part 2
Part 3
Part 4
Part 5
Part 6
Part 7


No comments :
Post a Comment