Models in Bottles

Building ships in bottles from scratch

September 15, 2016

Ship in Bottle 3 (part 6)

2 comments
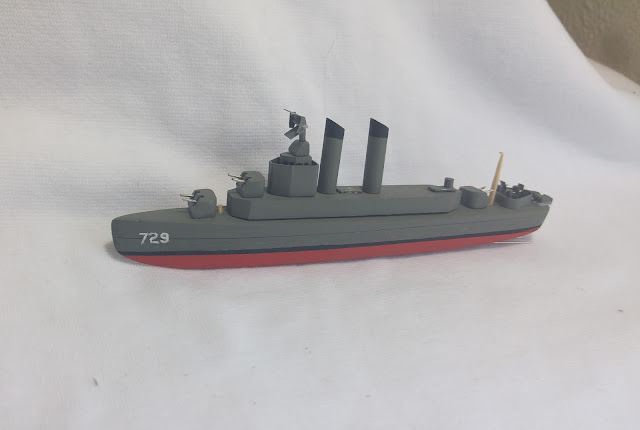
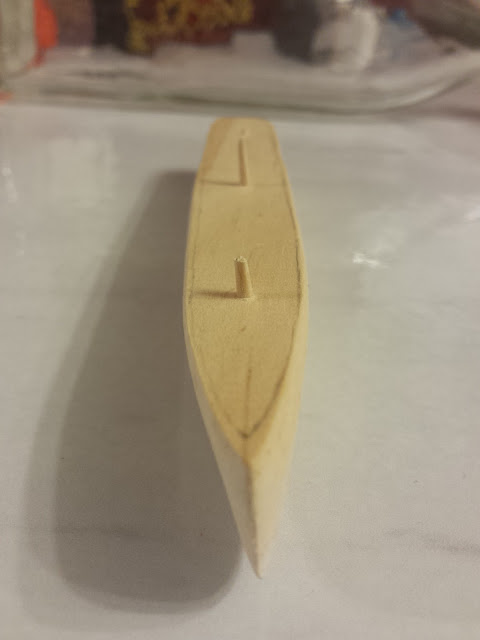
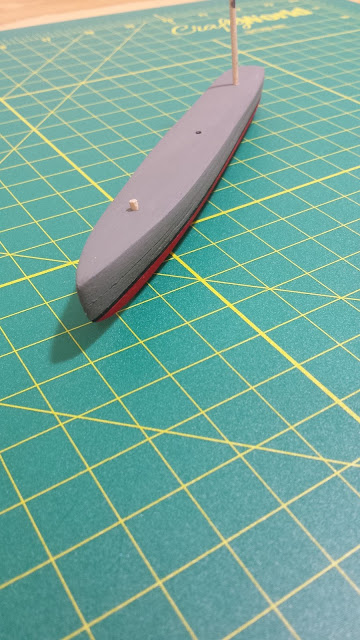
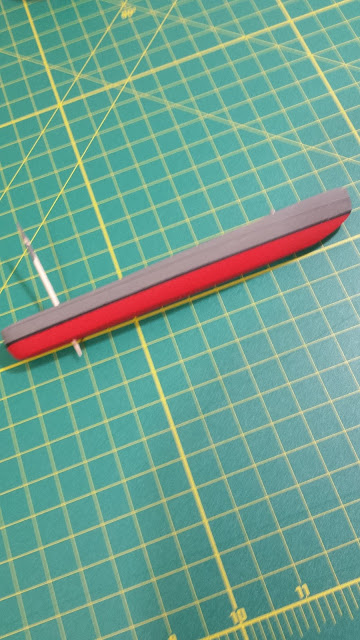
Guess what? The friggin thing won't fit in the bottle! I don't know how I forgot to check this weeks ago, but I guess I did. The hull was just too wide, no chance this ship was going to fit through the neck of the bottle.

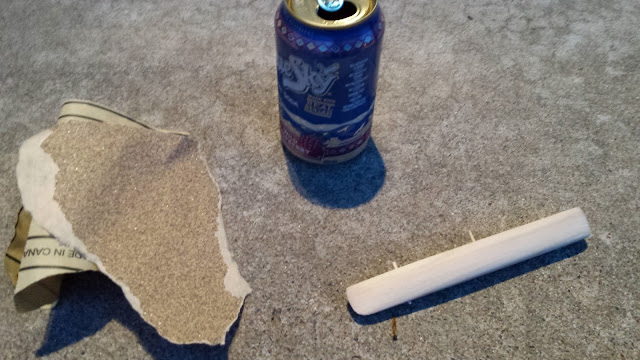
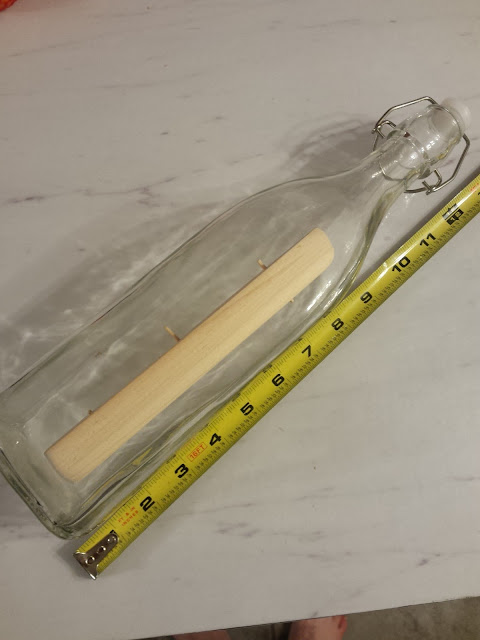
What's more, this isn't the first time I've made this mistake. Note the top picture of the finished product compared to the next picture which is me planning the ship using a different bottle. Yup, got everything built, tried to put the ship in the bottle, and discovered it didn't fit. Had to get a new bottle because I wasn't willing to rework anything. Today, I'm going to go the rework route instead.

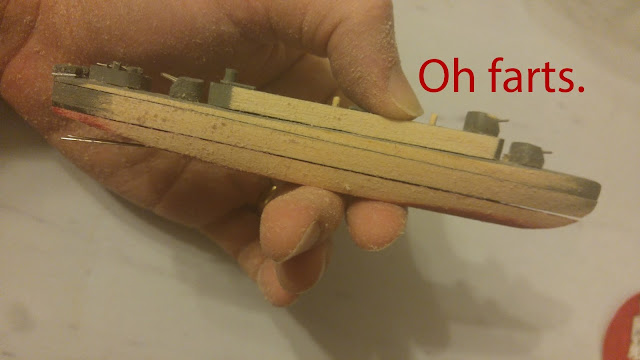
I can't believe I have to say this, but seriously, when you're done shaping the hull, you're going to want to make sure the ship fits in the bottle. Otherwise, you either get a new bottle or fix the ship. This was fairly heartbreaking but it had to be done:

Resanded hull since model won't fit in the bottle
Sorry Lyman.

I'm hesitant to say this because I might be doomed to repeat the mistake, but "Oh well, lesson learned". I'll obviously have to repaint it after this sanding, but the only other thing I lost was the hull number which is fine--I was only 80% happy with the "729" anyway.

I've repainted since this picture and added a few for structures to the deck. Oh, almost forgot, I made sure it fits in the bottle now. That's important.

The USS Lyman K Swenson is getting there slowly but surely. I'd still rather be struggling with a model than sitting in the Pacific shooting down kamikaze pilots. I have it easy.


Posts for this build:

Part 1
Part 2
Part 3
Part 4
Part 5
Part 6
Part 7

September 2, 2016

Ship in Bottle 3 (part 5)

No comments
Well hey we're coming along nicely.

uss lyman k swenson model
Looking pretty cool

I've done a lot in the last few weeks, since we last spoke:
  • Rounded out the 3x2 5" gun mounts (the big 3)
  • Added a second tier for the superstructure
  • Created the bridge
  • Topped the bridge with a radio antenna
  • Added smokestacks
  • Added 10 torpedo tubes (5 between smokestacks and 5 at the back of the raised deck)
  • Stumbled my way through three of the eleven 20 mm AA guns (rear of ship)
  • Made two depth charge tracks at the back of the ship
Jesus, I should have blogged some of this along the way. Let's take a closer look at all the parts

uss lyman k swenson model in pieces
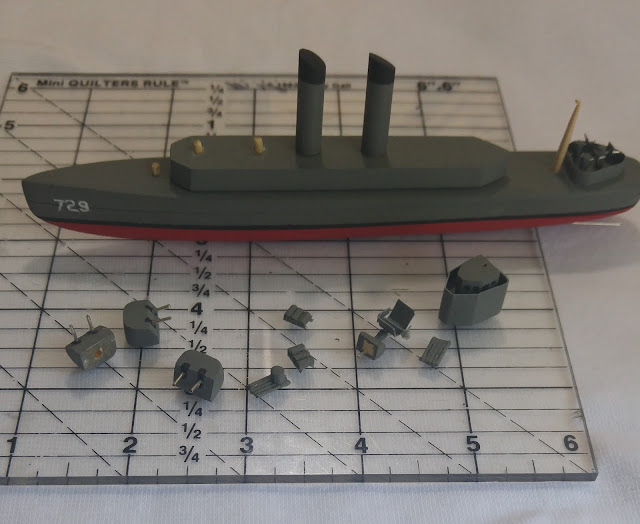
Bunch of pieces

In the foreground to the left you see the big guns which we already covered. Next you see the rear torpedo tube which is just made out of five lengths of wire, similar to paper clips, just snipped, glued side by side, and painted. I had a tiny dowel that I cut to make what I can only assume is some control apparatus that sits on top.

To the right of the first torpedo tube array are the depth charge tracks that sit on the back of the ship. The depth charges look like barrels that just roll off the back of the ship, sink, and blow up, potentially ruining a submarine's day. These are two separate tracks each with three depth charges made out of toothpicks. The real USS Lyman K Swenson had tracks that held 12 or 15 (can't remember which) depth charges but I can't fit anything longer than 3 because I'm an idiot.

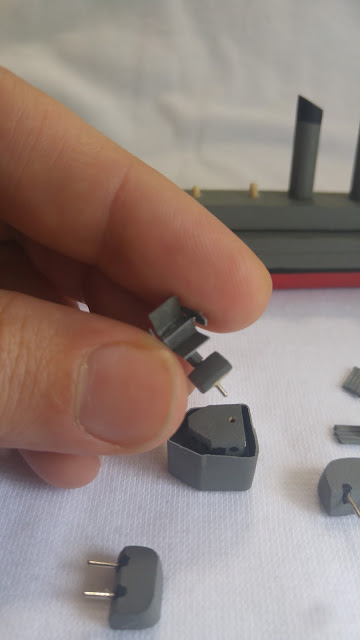
Next to that is the radar that sits on top of the bridge. Looks like a desk chair. Then we have another torpedo tube array and the bridge.

The bridge was made using some wood wrapped in cardstock that is taller than the wood so as to create a fence or rail. Then I cut a smaller piece of wood and fit it inside.

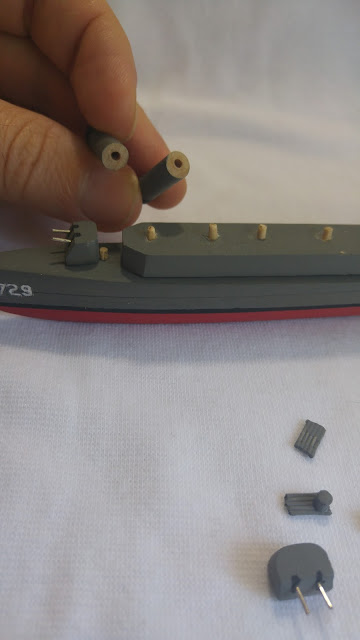
The smokestacks were made from dowels cut at an angle and painted. The AA guns at the back were a pain in the ass and I'm not too sure how I feel about them, but I'm going to have to make 8 more of them. By the time I have 11 of them on this ship I'll definitely have a strong opinion. I'm just not yet sure if my design works or if it makes it look like a 10 year old made them.

I do want to show you a close up of the radio antenna I made. Fun fact: the easiest way to see if you're looking at a picture of a US Navy ship from WWII/Korea era or Vietnam era is that in the later war you'll see a satellite dish instead of a radar antenna. Neat.

radar antenna model
This took an embarrassing amount of time to make

I'll agree it looks kind of silly up close but once the whole ship is assembled I think it reads pretty well. It better, because it took me like 3 hours to make it. It's made from four pieces of folded and painted cardstock, two pieces of wire arranged like a cross, and a little piece of wood for a base. You can see in the background that this will get mounted into that hole on top of the bridge, but I'll have to do that once the ship's in the bottle.

Speaking of having to build stuff once the ship is inside the bottle, I tested the heights to see what I could actually start securing to the deck outside the bottle.

Always a good idea to test the fit

Well jeez, I'm going to have to assemble a lot of this ship inside the bottle. Looks like I can glue the big guns down, which you can see in the image above through the neck of the bottle, but anything the height of the bridge or taller is going to have to wait until I'm inside the bottle. Farts. Solution time.

model ship part mounting
For easy assembly of the ship inside the bottle

I decided I could get the most precise layout by drilling holes for toothpicks in the deck and in each of the pieces. This way I can slide the hull into the bottle, then slide the deck into the bottle, and finally, use some glue and some long pokies that I have, drop them into their final homes. This would be far easier than gluing stuff inside the bottle without a well defined layout. At least I can glue down the big guns, AA guns, torpedo tubes, and depth charge tracks.

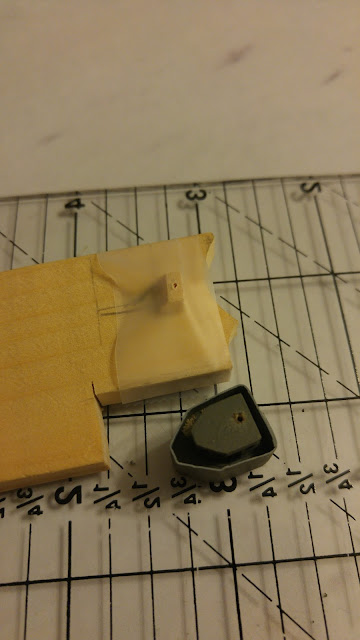
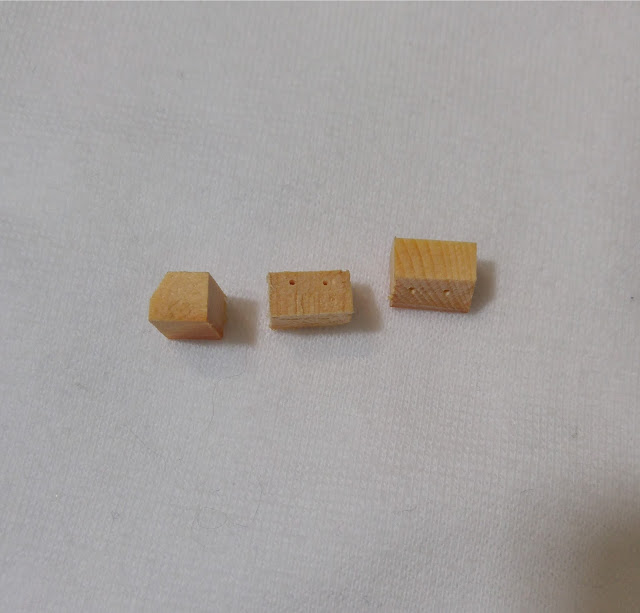
I'll leave you with one last thing since the point of this website is to share what I learn as I build ships in bottles from scratch. The base of the antenna is a tiny piece of wood with a hole drilled through it. It can be hard to drill tiny holes, so I do a lot of this:

drilling in small wood tips
Protip

Secured it with plain old scotch tape. Until next time...

Posts for this build:

Part 1
Part 2
Part 3
Part 4
Part 5
Part 6
Part 7


June 27, 2016

The Niña and Pinta

No comments
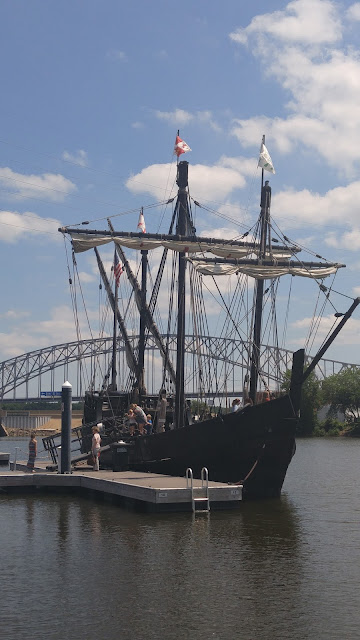
I don't know what it is, but I love the look of old sailing ships--that's why I like building ships in bottles so much, and it's probably why you're here reading about building ships in bottles. Unfortunately, I live in Iowa so I've never actually seen an old style sailing ship...until now! For Father's Day my wife and daughter were looking for something fun for us to do and they found that the Niña and Pinta were sailing up the Mississippi river and would be an hour away from our house.

These two ships were commissioned in the late 1980's by the Columbus Foundation and are easily the most realistic replicas of Columbus's ships ever built. For $8 you can walk on board and talk with the staff who will be happy to answer all of your questions. You can read more about the Columbus Foundation and their ships. You can even volunteer to work aboard these ships for a minimum 3-4 week commitment. Man that would be something.

Keep an eye out, since they travel the eastern US river system, it's a great way for landlocked people to finally set their eyes on a legit-ass sailing ship! My advice: take tons of pictures. Being able to walk around the ships I was able to see angles I've never seen before and I was able to take note of details that will help me in future builds. For example, I didn't realize the deck is inclined so highly at the bow and I'm not sure I ever would have realized that without standing on it myself. My ships in bottles will definitely be impacted by this experience, especially in the realms of details and realism (which is probably 90% of modeling anyway).

I'm not carrying a purse. Two year old children require a bag. This is the Niña. Thumbs up dude.

The Niña front right
The Niña again

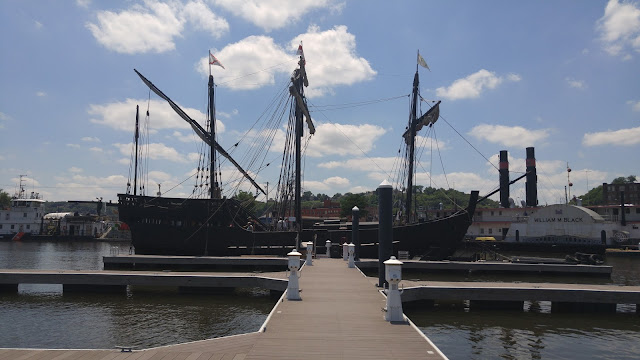
The Pinta broadside
The Pinta, larger of the two. This one was built slightly larger than reality.

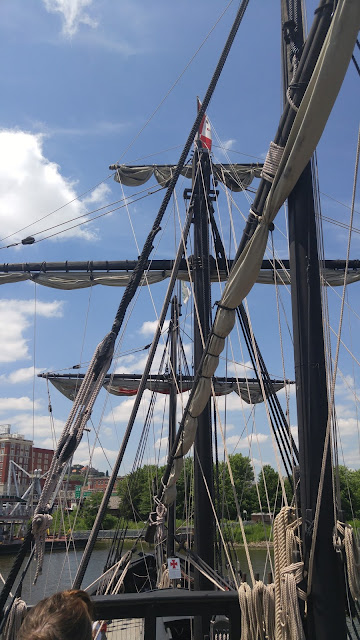
The Pinta rigging
Look at all that rigging. Pinta from the upper deck.

We should probably talk about models since that's kind of the point of this website. Fun fact: in the 1490's it was hard to find a shipwright who was literate so the "blueprints" they used were actually models.

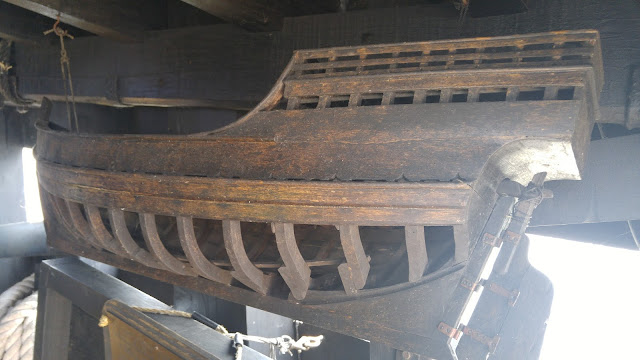
The Niña model blueprint
Model serving as a blueprint for Niña. Built by a 15 year old Brazilian kid.

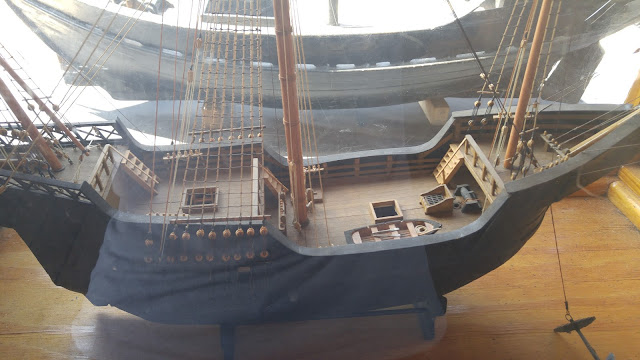
Santa Maria model onboard the Pinta
What about the Santa Maria? They had a detailed model of it on the Pinta.

I realize this post isn't strictly about building model ships in bottles, but it was such a unique experience for an Iowan that I figured I should share it. I've heard enough from some followers on my Instagram to know that I'm not the only landlocked sucker who would love to see a ship like this but assumes they'll never get the chance. Be sure to check out the Columbus Foundation's website about these ships and see where they'll be going next, maybe you'll get lucky!


May 22, 2016

Ship in Bottle 3 (part 4)

No comments
Let's make some guns! The armament is extensive on this destroyer but for now I'm just focusing on the largest guns. I did some research to find out that the USS Lyman K Swenson (all Sumner class destroyers...and apparently most of the US Navy at that time) had 5/38 caliber guns in Mk 38 DP mounts in a 3x2 configuration. Wtf does that mean?

5/38: This gun shoots a 5 inch diameter shell (holy crap) and the barrel is 38 shell-diameters long (5x38=190 inches, or 15.8 feet).

Mk 38: Mark 38 - I think this means the 38th revision of the gun. I wouldn't be surprised if someone can correct me here though.

DP: Dual Purpose - it can be loaded with one type of shell and powder charge for surface engagements (shooting at other boats and I think this also includes bombarding targets on land) and can be loaded with a different type of shell for air targets. I didn't realize dual purpose guns existed. Pretty badass.

3x2 configuration: There are three gun mounts, each with two barrels.

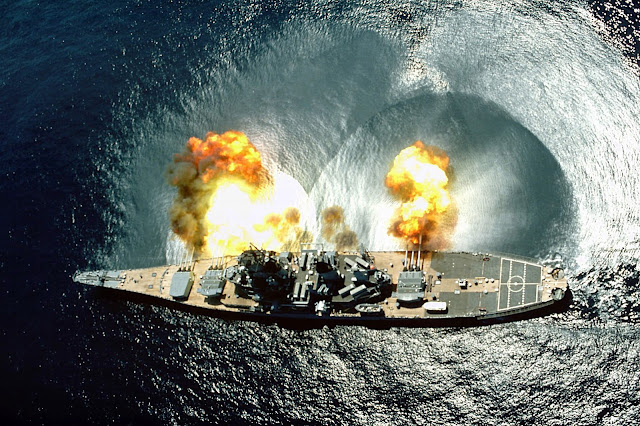
Bucket list addition: I want to hear these go off in person, but I'd settle for the 16 inch monstrosities that the Iowa class uses. By the way, look what that looks like firing a broadside:

USS Iowa firing a broadside like a badass
USS Iowa firing a broadside of nine 16 inch and six 5 inch guns. This is like 20,000 pounds of lead.

I need to quit researching these guns before I run out and join the navy. Anyway, as I said before, let's make some guns. I put my scroll saw to the test and cut out the basic shapes. I also used my smallest drillbit which is 1/32" to make the holes where the barrels would go. At this point I'm still not sure what I'll make the barrels out of.

unpainted handcrafted 5in 38 caliber guns
Since there are three, I can show you three sides at once (side view, front view, top view).

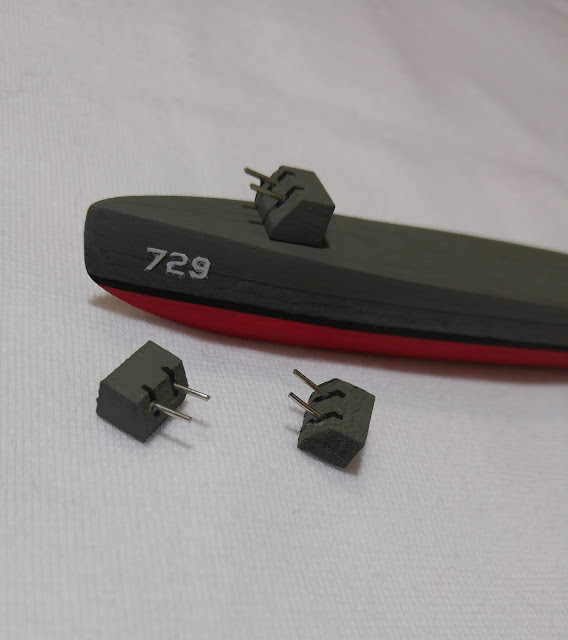
They're small, but I was able to paint them by hand. I used the same gray that I used for the hull and then painted the black lines delicately. The black lines are slots the barrels elevate within and since these are dual purpose they need to be able to elevate to a high angle. That means I need to make sure the lines continue on the roof of the mount. I lucked out and found that the steel wire I have (I decided to use steel wire to make an anchor here) is exactly 1/32" so it worked perfectly as barrels. A little glue on the ends and I was able to shove them in the mounts. I totally eyeballed the length. Even though I know these barrels are 15.8 feet, I don't know how much length protrudes outside the mount. They look about right to me.

scratch built model 5 inch 38 caliber guns
That looks pretty decent I think. I might paint the barrels to remove the shine.

So there we go, 3x2 Mk 38 DP 5"/38 caliber death machines. I'm dragging my feet because the next thing to do is the superstructure but I'm nervous because it's a busy jungle gym of platforms and towers. I'm sure I'll figure something out.


Posts for this build:

Part 1
Part 2
Part 3
Part 4
Part 5
Part 6
Part 7


May 15, 2016

Ship in Bottle 3 (part 3)

No comments
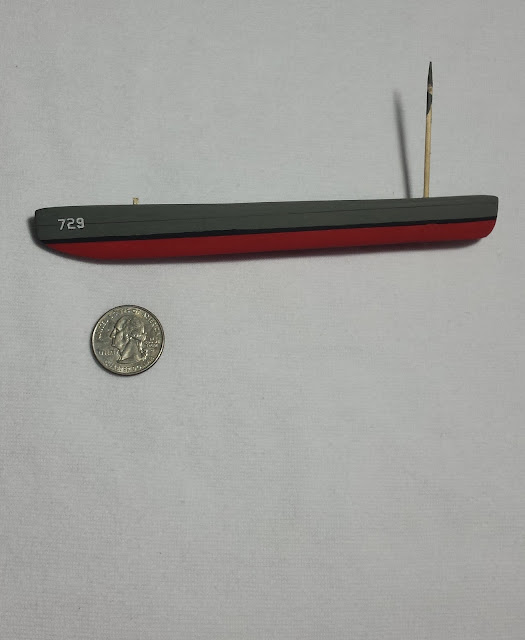
This will be a short post as I haven't made too much progress since the last post but I did get the hull numbers on there and I'm pretty happy about how they look so I figured I'd share. USS Lyman K Swenson had hull number 729, so here's what it looks like once I added it.

adding hull number to model ship
Looks pretty cool I think

I had a bunch of ideas for how I was going to do it but eventually settled on printing them, cutting them out, and gluing them on. I'm glad I went with this route because my original thought of painting them by hand was not going to pan out. Too small.

I started by googling "battleship hull font" and found an image of 0-9 written out in the right font, so I just saved the image and printed it out a few times until I had something that seemed like the right size.

miniature modelling magnifier
You can see the 50 of these that I printed in various sizes

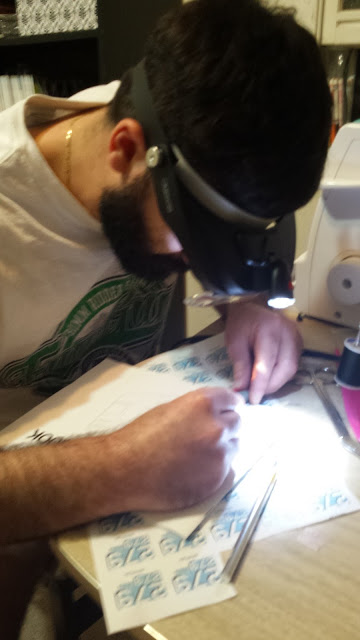
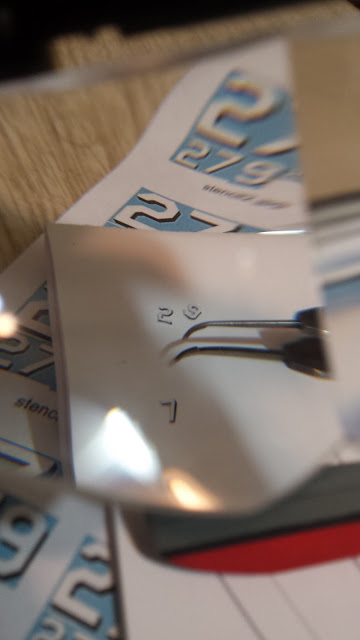
Threw on the magnifiers and started cutting with the x-acto knife. Took a few tries, some bad words, and some hours, but I got there. The inside of the 9 was especially difficult. (Protip from a woodworker on Instagram after I mentioned my difficult time: use a tiny drill bit to drill out the center of the 9)


through the lenses
Neat shot through the lenses

Once I had them cut out, I used tweezers and a glue stick to get them on the hull. Then I felt good about myself. I think it looks pretty awesome, but I've still got a long way to go. Creating the guns and towers is probably where I'll go next and that will really start bringing this to life.


Posts for this build:

Part 1
Part 2
Part 3
Part 4
Part 5
Part 6
Part 7

May 9, 2016

Ship in Bottle 3 (part 2)

No comments
Alright, we've done our research and we've completed planning the scale for a historically accurate ship, so we're ready to get some real work done.

As in my previous two builds, I started by stacking wood planks (visit the tools and supplies page to see the wood I'm using), drilling three holes in them, and shoving toothpicks in the holes to keep it all pinned together. This time I'm using three planks because it matched the dimensions from my scaling maths.

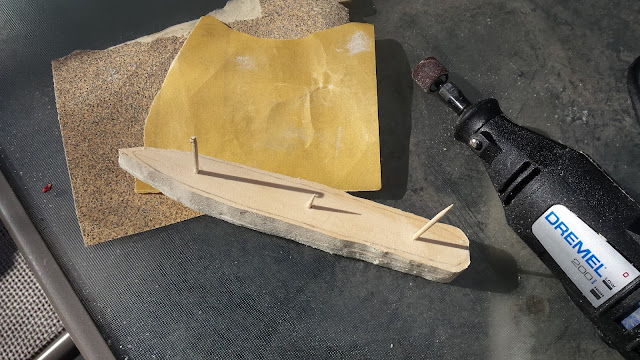
Next I cut out the scale drawing I made in the last post, put it on top of the wood, and traced it so I have a guide. I used a Dremel to sand away most of the wood and when I got to the point in the picture below I switched to sanding by hand.

building the model ship hull
I finally have a scroll saw. Hopefully I won't have to sand like an idiot anymore.

Seriously though. Get a scroll saw.

saturday night fun time
Without a scroll saw there's not much you can do other than sit on your stoop at midnight with some tunes and get sanding.

So after a number of hours that I'm not prepared to admit publicly, I finally got most of the sanding done. It took a couple of sessions. I basically would sit down with a picture of the ship and just keep referring to it while sanding. If anyone else has a better method, I'm all ears. (Yeah I know, use a scroll saw.)

If you recall from my first build, I forgot to check that the ship would fit in the bottle, so I went ahead and did that at this step. Not only do you want to verify the individual pieces can fit through the neck but you also want to make sure the proportions look good in the chosen bottle. If they don't, get a different bottle.

ship and bottle
Damn that's going to look pretty good.

I made a few minor adjustments to try and achieve the mean, sharp look of the real hull. 

WWII destroyer model
Just a little more sanding and we'll be ready to paint.

At this point I'm just dying to paint the thing because I have an embarrassing number of hours into the project with little bang for my buck. Painting makes you feel like you've achieved something because it's such a drastic change compared to naked wood. In actuality I have plenty of bang for my buck, it just feels slow going.

I noticed that obviously the ship is gray above the water line, black at the water line, and it's red below the water line. Fun fact, the red paint is used to slow the growth of bacteria and barnacles. It's red because it has a lot of copper in it.

I separated the three pieces off the toothpicks and started painting. Pretty self explanatory except if you're wondering how I did the black stripe. Still pretty simple but I just masked it off with tape and painted with a small paintbrush. Felt like surgery, was cool, would recommend.

painted destroyer USS Lyman K Swenson model
Starting to feel like a WWII destroyer.

side view painted destroyer model
I like the red. Mixed a little brown with it to tone it down.

The next step is where things are going to start getting complex because we have to build the superstructure (all the shit that sits above the deck). I'm looking forward to making the guns but the bridge and towers and smoke stacks seem a little daunting to be honest. I'm sure we'll get there though. Thanks to my buddy Alec for the scroll saw, it's going to be a huge help for the next phase!

Actually I'm pretty excited to get the "729" on the hull so I'll probably do that next. No idea how, but I'll be sure to report on that.


Posts for this build:

Part 1
Part 2
Part 3
Part 4
Part 5
Part 6
Part 7

May 4, 2016

Ship in Bottle 3 (part 1)

No comments
I've begun work on the USS Lyman K Swenson as I mentioned in an earlier post, Researching Historic Ships for a Build. Now that I know what the hell I'm trying to achieve, it's been pretty enjoyable learning about the build details (mostly the dimensions and armament) but also the history of the ship. The WWII section from the Wikipedia article on the Lyman K Swenson lines up with my grandfather's stories really well. It's almost like hearing him tell the stories again, but with less humor. That's alright, I remember all the funny parts anyway.

So here's a reminder of what we're shooting for:

USS Lyman K Swenson in 1950

Since this isn't a sailing ship I don't really need to sketch out the entire ship ahead of time. Really all I care about right now is the general dimensions of the hull and deck. I'll worry about superstructure later. I started by sizing up my chosen bottle and doing some math to find a scale that would fit in the bottle pretty well. Working off the real ship dimensions (seen below, upper left) I shot for about 15 cm which came out to 1:750 scale.

math to scale a model ship
Scaling math

I wrote down the real dimensions (length overall, length at the water line, beam, draft, human). The width to length ratio is a little over 10 to 1. By scaling with a factor of 1/750 I get 15.3 cm in length overall which fits great into my bottle. The width (beam) is just over 1.5 cm which is a reasonable challenge through the neck of the bottle, but is indeed possible. So we're set!

Why did I write out a human size? I wanted to put my grandfather saluting on the bow, but was a little sad to find that at this scale he'd only be about 2.5 mm tall. I'm holding out hope I can work around that later, but we'll find out at the end of the project. (Update: I ended up using signal flags D, J, and T for Donald Joseph Tyson, which my grandmother assured me was a great tribute, and I hung them from the mast)

In pencil I sketched the outline of the deck from an aerial view to serve as a template. You can see this lightly on the bottom half of the picture above.

Alright so we've got it all planned out and we're ready to begin generating some sawdust. Amen. I'll be updating soon with the progress.


Posts for this build:

Part 1
Part 2
Part 3
Part 4
Part 5
Part 6
Part 7

April 29, 2016

10 Interesting Things About Me

No comments
I'm a little stuck on my current build so I thought it'd be fun to shift gears and write a little about myself while I wait for my craftsman's block to subside. That's a thing, isn't it? Like writer's block? So here are 10 things about me:

I don't know much about ships or woodworking. I started this blog as a beginner with the intention of helping other beginners. I'm still a beginner.

2  My day job is in the field of computer science. It's probably easiest to just say I'm a computer programmer, though I could bore you for awhile with a more esoteric description.

3  I live in Iowa, and not even along the Mississippi river so I never see any ships. Fun fact: technically I'm Mr. Linn County because I'm married to Mrs. Linn County (my wife thought the Mrs. America pageant would be an interesting life experience. "Interesting" proved to be a good word for it).

4  I'm married and have one daughter. My wife is currently a stay at home mom who has an amazing talent for sewing. Check out her work at Pockets and Sleeves! My daughter is two years old and I'll let you insert all the cliches about how people generally feel about the light of their lives. Suffice it to say she's awesome and the cliches are true.

5  My other hobby is cooking and I especially like to try new recipes on the weekends. I can make a red sauce and meatballs capable of competing with your Italian grandma's sauce. Actually my meatballs are better than hers. Oh, I like to roast my own coffee too; I take coffee pretty seriously.

6  I'm a trained weather spotter with the National Weather Service. Sounds cool but really you just take a 2-3 hour class every four years and then you report hail/strong winds/heavy rain to a website. It's fun though, I like severe weather.

7  I've been sober since November 29, 2013.

8  I was homecoming king in high school which is cool because I was in marching band instead of on the football team. Take that, teen movie plot lines!

9  A few random skills: pretty damn fast at mental math, been playing the trumpet for 15 years, can juggle, y yo hablo español. I've practiced Brazilian jiu-jitsu for 2 years.

10  I can grow a full beard in like two days. It's a curse but it's the best curse. This is what I look like when my daughter puts fuzzy balls in my beard:

balls stuck in beard

February 8, 2016

Researching Historic Ships for a Build

3 comments
The next ship I build is going to be the USS Lyman K Swenson which was my grandfather's ship during WWII. This ship saw action in WWII, the Korean War, and the Vietnam War. Naturally I want my build to reflect the early years while he was sailing.

USS Lyman K Swenson DD-279
USS Lyman K Swenson

Pictures of anyone particular ship from this era are pretty rare. I mean googling "Lyman K Swenson" is going to give you a dozen blurry pictures at best, so I had to get creative with my research. This is the line of thinking that got me a lot of great pictures and dimensions to work off of:

What class are you trying to build?
Lyman K Swenson is a Sumner class destroyer. That knowledge alone increases your googability 58 fold (since there were 58 of those ships built). I can settle for any good photos of Sumner class destroyers and just know I need to paint 729 on it.

Is it related to any other classes?
It just so happens that in WWII the US only used three destroyer classes: Fletcher, Sumner, Gearing (and some weird minelayer offshoots). I was able to find out the Sumner class has a different gun layout than the Fletcher and the Gearing is a little longer than the Sumner. Otherwise, they're basically (totally?) identical.

What changes did that class go through?
The Sumner class, and I assume other classes, went through a huge facelift for the Vietnam War called FRAM (Fleet Rehabilitation and Modernization). If I want to build her like she looked in WWII, I just need to find photos prior to FRAM. Now we're getting somewhere.

So what's the bottom line?
I went from being able to use a dozen or so grainy pictures to literally any picture of a WWII destroyer, so long as I know what needs to change. If the picture has a Fletcher hull number, I can't use it to model the guns, but I can use it for any other part of the ship. If the picture has a Gearing hull number, I can use it for anything except scaling dimensions of the hull.

I'm not sure when I'll get started on this build, but hopefully it will be in the next few days to a week. I have the bottle, but I just need to find the time to plan and sand out the hull. I have no idea what I'm going to build the superstructure out of. Oh well, that's a problem for another day.

Finally, thanks for your service, Pop. I love you and miss you.

Pop in the US Army in Korea

Gram and Pop being awesome

January 18, 2016

Ship in Bottle 2 (part 4/4)

No comments
So before I throw this bad boy in a bottle, I decided to add some details, but I didn't go too nuts with it, just adding flags.

Added a white ensign because I wanted a British warship. Added green flags because they look cool.

The green flags are easy, just color some paper with a marker and then cut out a few flags until you have two favorites. I kind of cheated on the white ensign by printing it out on a computer. The trick is to print a horizontally reversed image too so that you can make a two-sided flag. 

I fully expected to mess this up so I printed out a lot more than I needed.

Let's get this guy in the bottle, the suspense is killing me. I'm going to use skis that I can rotate just like I did on my first ship in a bottle tutorial. You're going to want to hollow out some of the hull too because you've got crap sticking out of the underside of the top deck (like the wire you used to secure the masts).

Dig out some material so the decks will mate together nicely.

I also put two blocks inside the bottle and glued them down, but didn't bother taking a picture of that process.

The skis rotate parallel to the hull. Slide 'er in.

Rotate your skis back to perpendicular. Dab some glue on the mounts. I put a glob of glue on a paintbrush handle and use that to gloob up the mounts.

Tip the hull onto the mounts, make sure you like how she's sitting. Call it a day.

You have to wait for the glue to dry. Glue dries slowly inside the bottle because of restricted air flow so I always let this part dry over night.

Next day, start by taking a deep breath and a shot of whiskey.

Fold your sails down. If it's a square rigged ship like this, hopefully you remembered to make your spars rotate too, which I covered in part 2 of this very ship in a bottle tutorial.

The green lines show you how my six horizontal spars are rotated since they're too wide to get through the neck when perpendicular.

We're in!

Not much else to say at this point. Dab some glue on the bottom half of the ship and mate the two together. Once you do that, again, let the glue dry over night.

Then you can shoot a neat little video like this: